RKKA Reenactment Uniform: How to Prepare Soviet WW2 Equipment
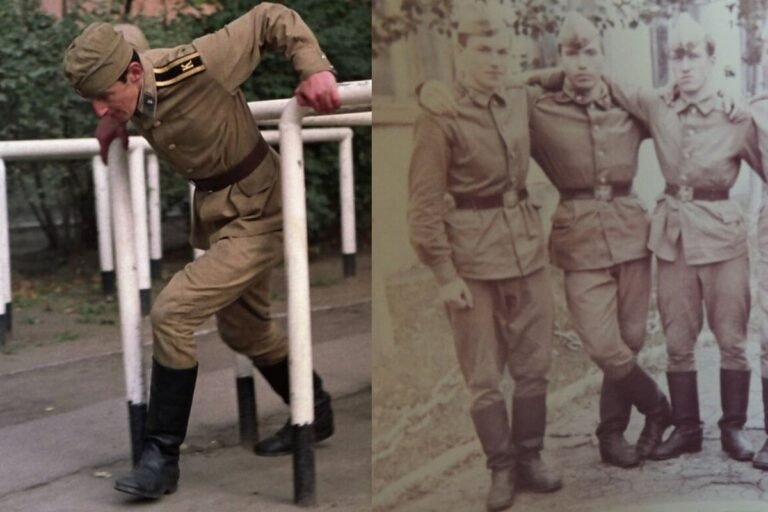
Preparing a proper RKKA reenactment uniform is important if you want an accurate Soviet WW2 impression.
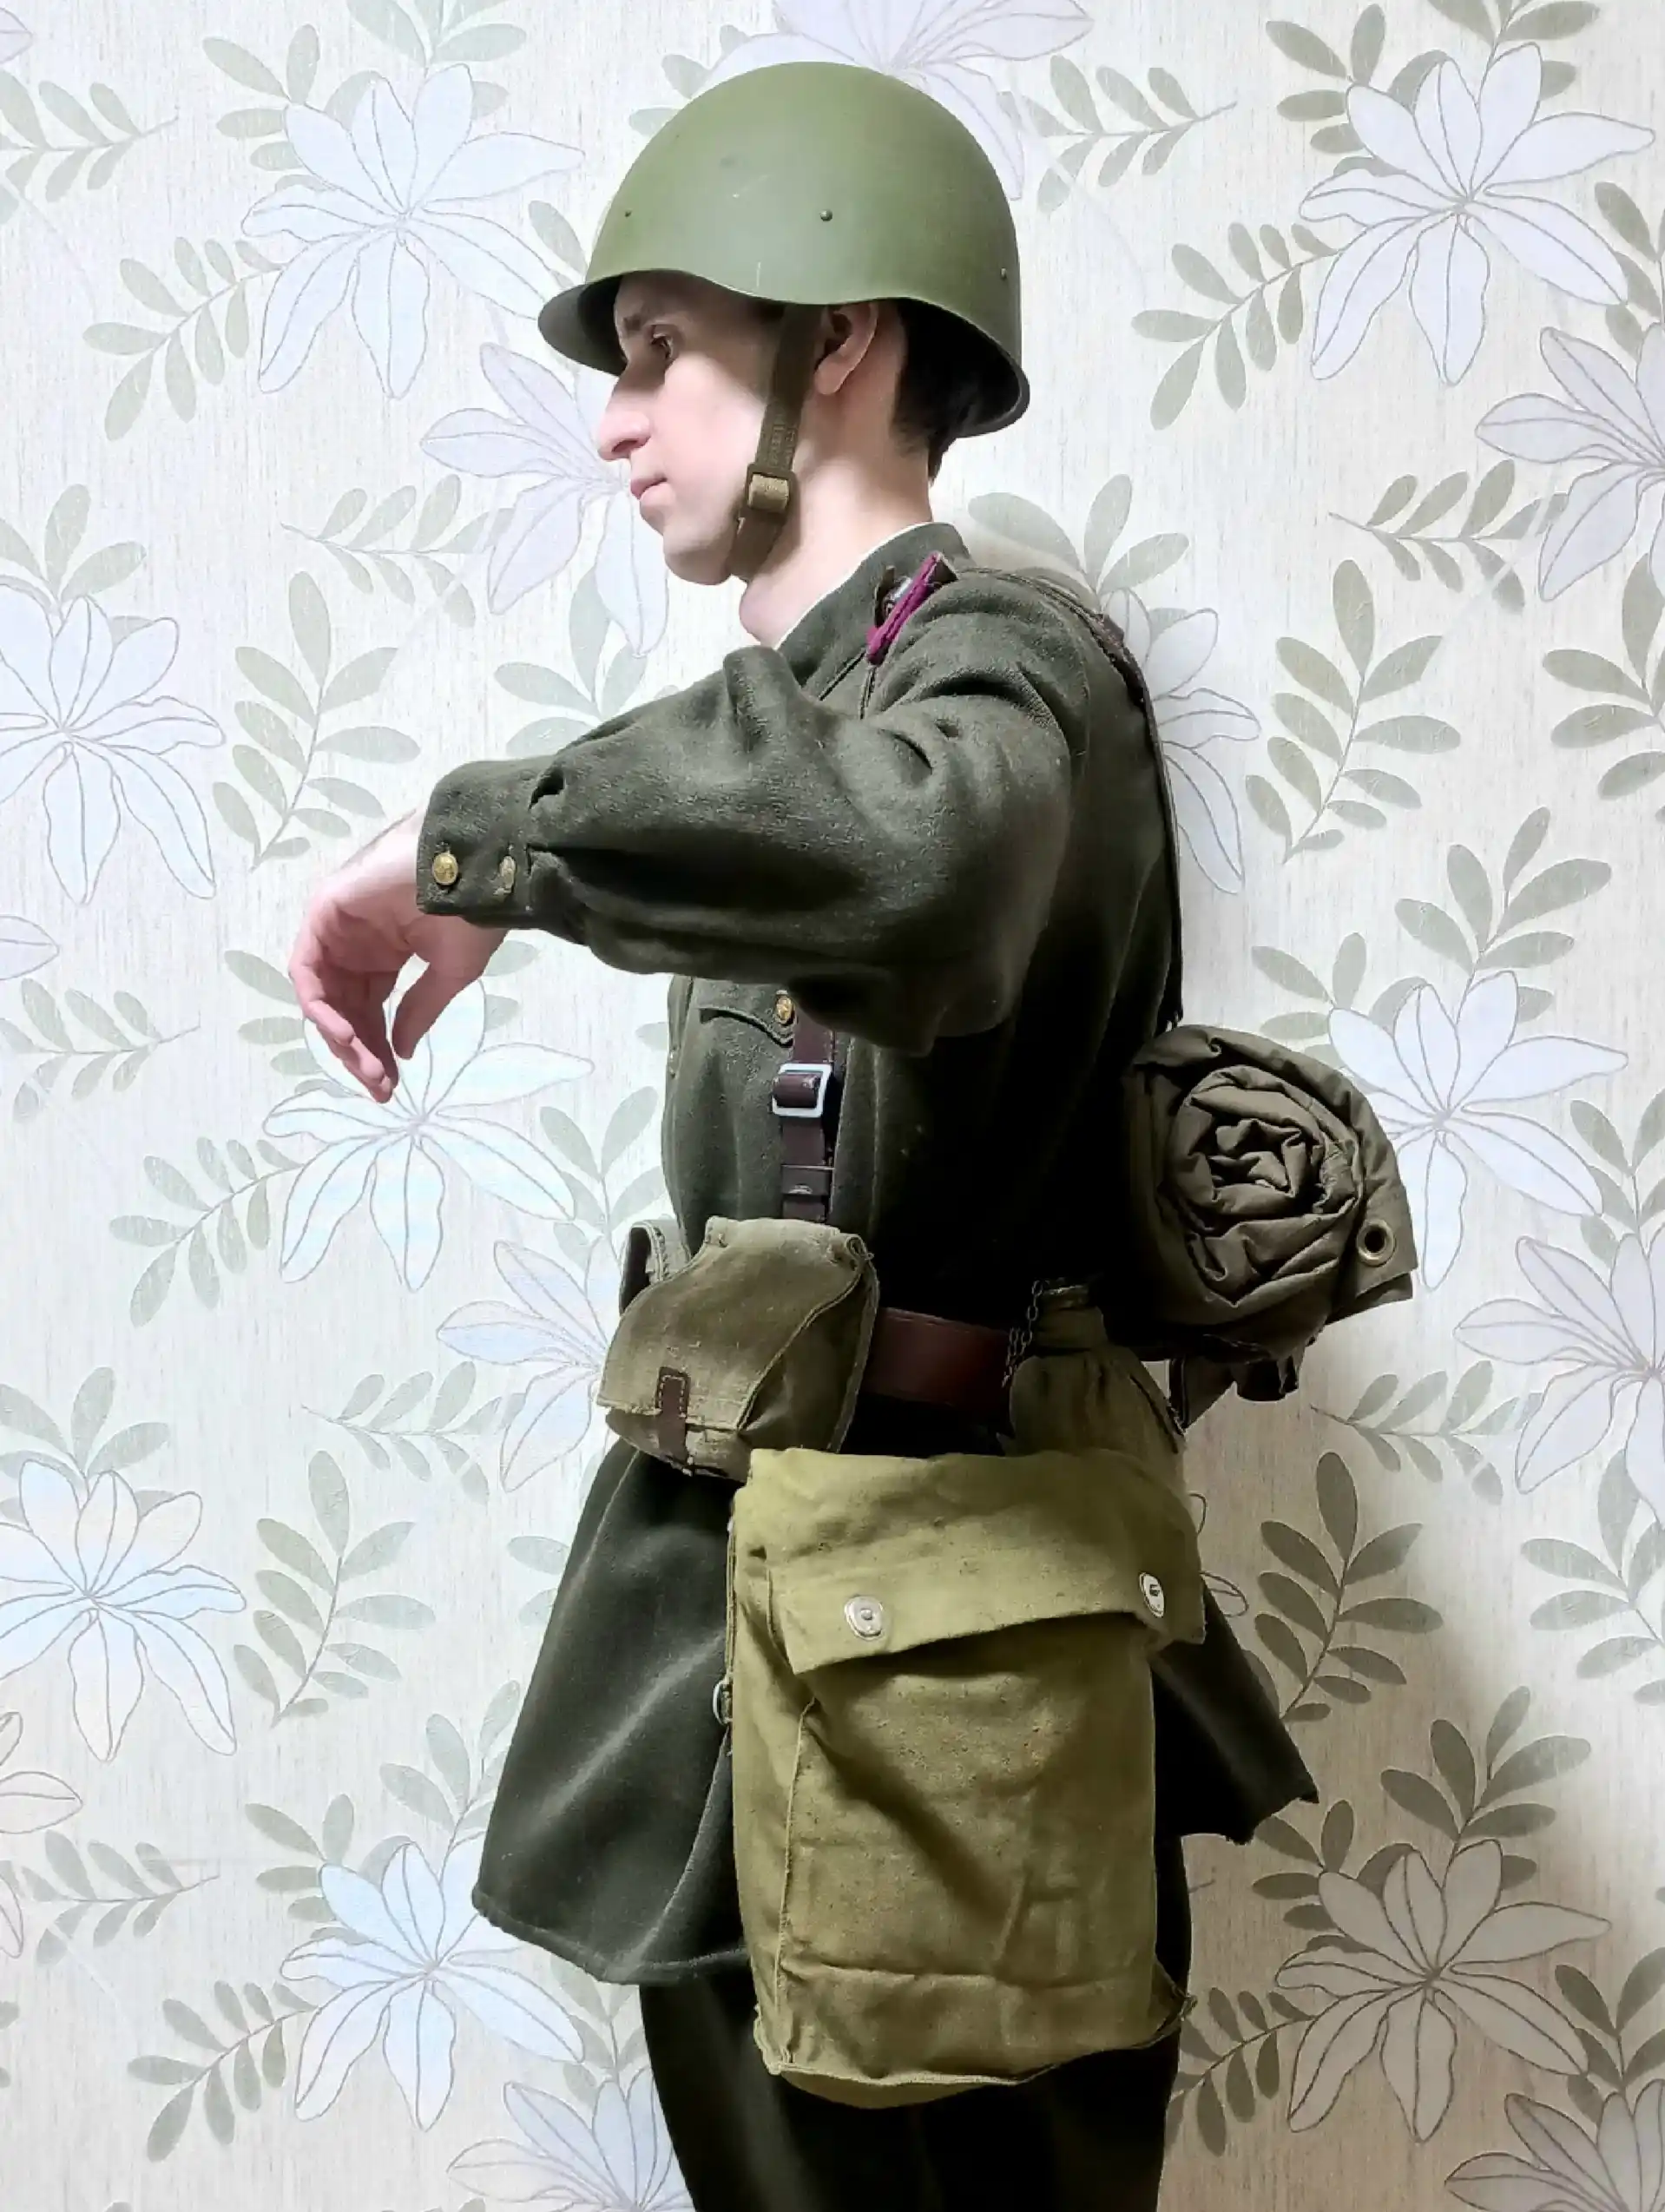
This guide shows the basic uniform and equipment every Red Army soldier should have.
It will help you build a correct and practical setup for reenactment.
More interesting articles:
WWII Reenacting for Beginners: How to Look Like a Real Soldier
Red Army Uniforms Before WWII: Complete Guide to Pre-War Equipment
Equipment Set of a Red Army Soldier in 1941 and 1945
How to Put Together a WWII Soviet Soldier and Officer Uniform for Reenactment
The minimum Red Army (RKKA) uniform kit required for a reenactment club includes the following items:
Uniform
- Cotton pilotka cap
- Cotton field shirt with collar tabs
- Cotton breeches
Footwear
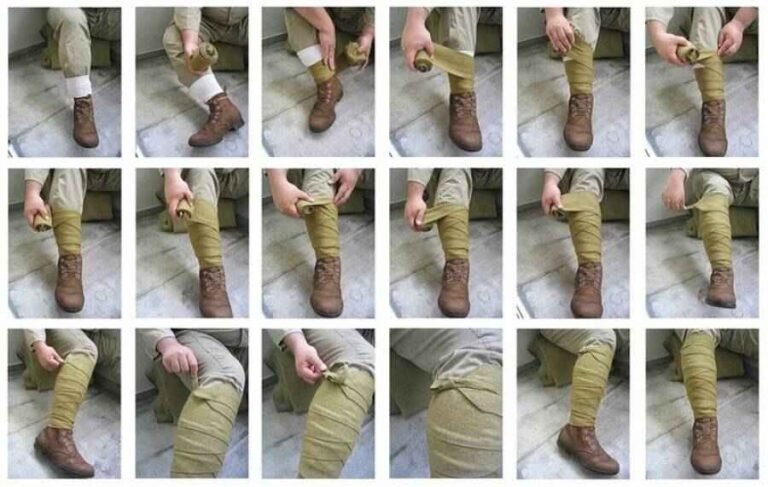
- Kirza jackboots or combat low boots with puttees (strictly black)
Equipment
- Steel helmet, model 1940
- Waist belt
- Trouser belt
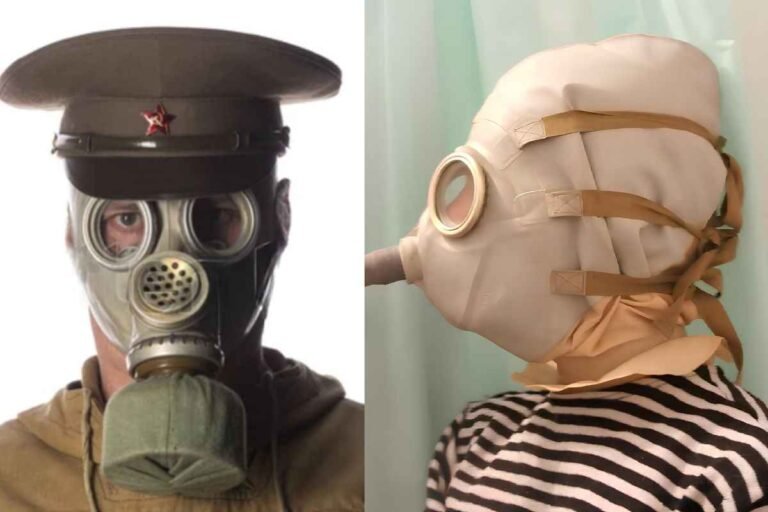
- Gas mask with bag (bag only is acceptable)
- Turkestan-type backpack (sidor)
- Cover for entrenching tool
- 2 ammo pouches
- 1 spare ammo pouch
- Grenade pouch (for 2 RGD-33 grenades)
- Mess kit with cover
- Canteen with cover
- Cup
- Spoon
Entrenching Tool
- Small infantry shovel
Backpack Contents
- Spare underwear set
- Set of small bags for personal items
This list is the minimum and strictly required for all reenactors.
Now in detail – how everything was worn
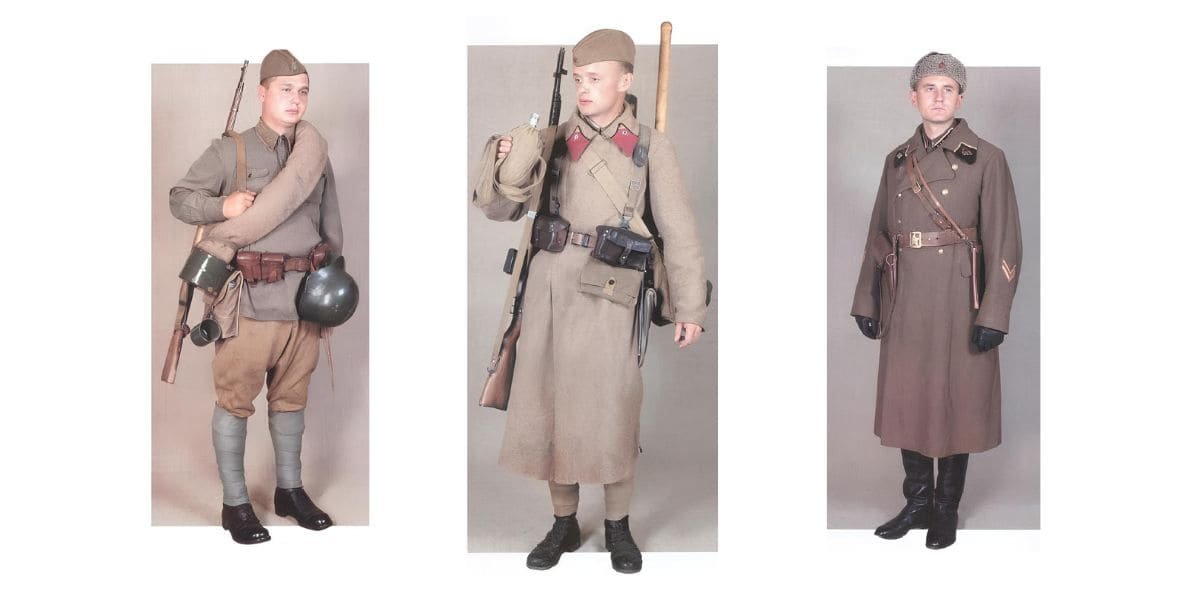
SOLDIER’S EQUIPMENT
1. FIELD (MARCHING) EQUIPMENT OF AN INFANTRY RIFLEMAN
The minimum required Red Army (RKKA) kit includes two configurations:
a) Full marching kit – when all equipment is carried, including the backpack with full contents.
b) Assault kit – when the backpack with extra supplies is not carried.
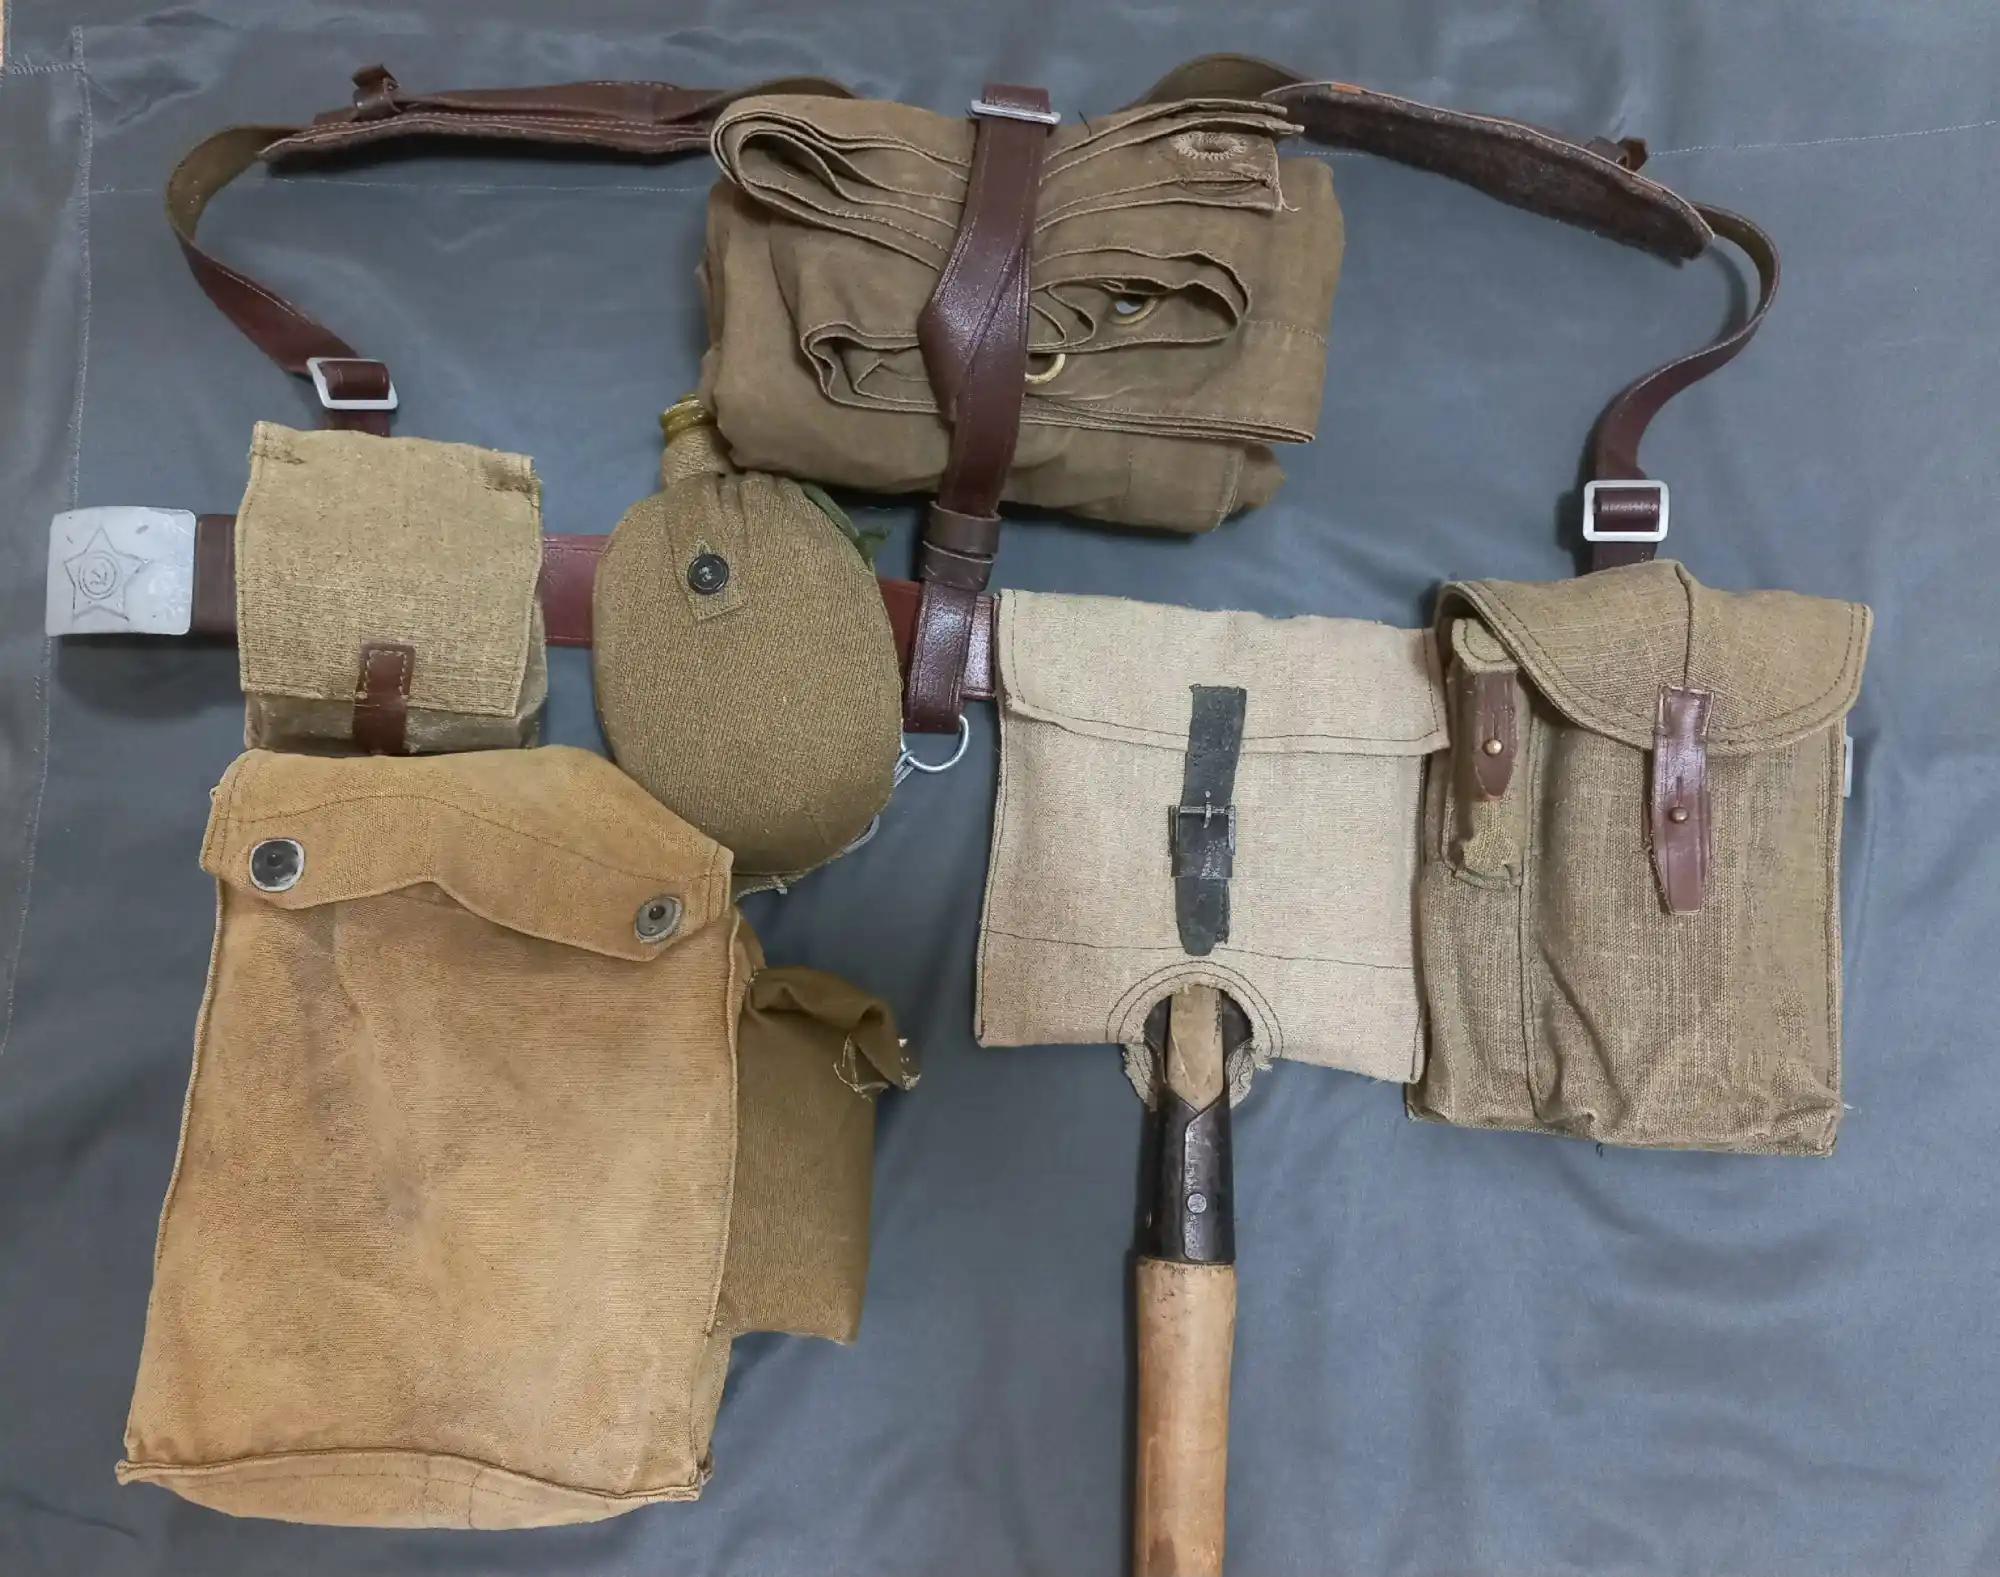
ASSEMBLY AND FITTING OF ASSAULT EQUIPMENT
Put items onto the waist belt in the following order, starting from the free end of the belt:
1. Left side of the belt:
a) Left ammo pouch together with the front left end of the shoulder strap; pass the strap between the loops of the pouch
b) Bayonet scabbard (by its loop)
c) Grenade pouch (using both loops)
2. Center of the belt:
- Rear end of the shoulder strap, using one of the three loops (depending on your height)
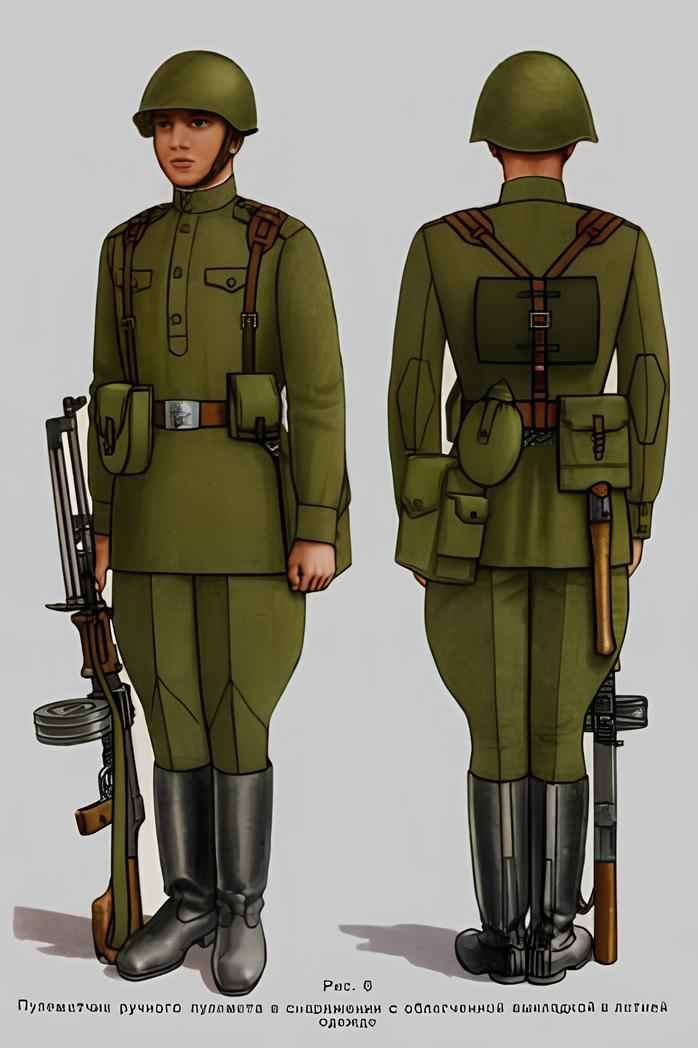
Fig. 6
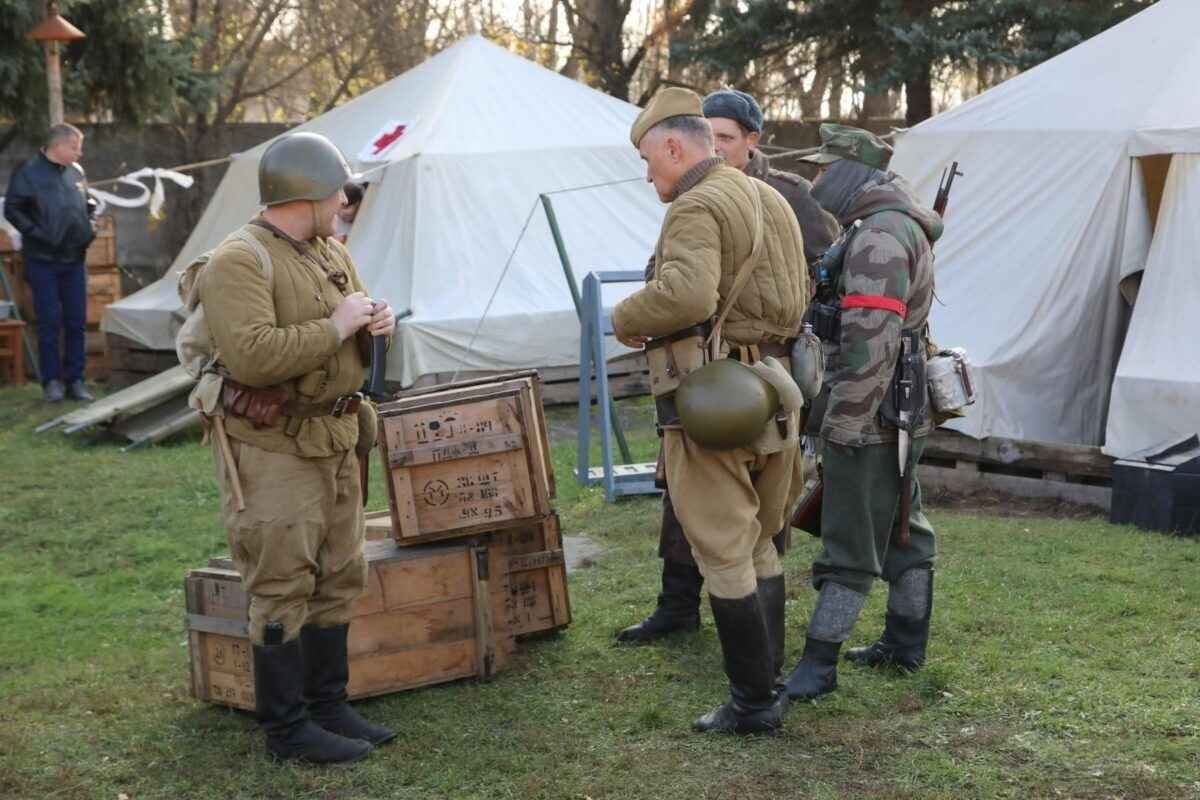
Machine gunner of a light machine gun unit equipped with a simplified gear setup for summer use.
3. Right side of the belt:
a) Canteen in cover (through its loop)
b) Entrenching tool (shovel) in cover (with both loops)
c) Spare ammo pouch and main ammo pouch together with the right end of the shoulder strap in the following order:
- Right loop of spare pouch
- Right loop of main pouch
- Left loop of spare pouch
- Shoulder strap
- Left loop of main pouch
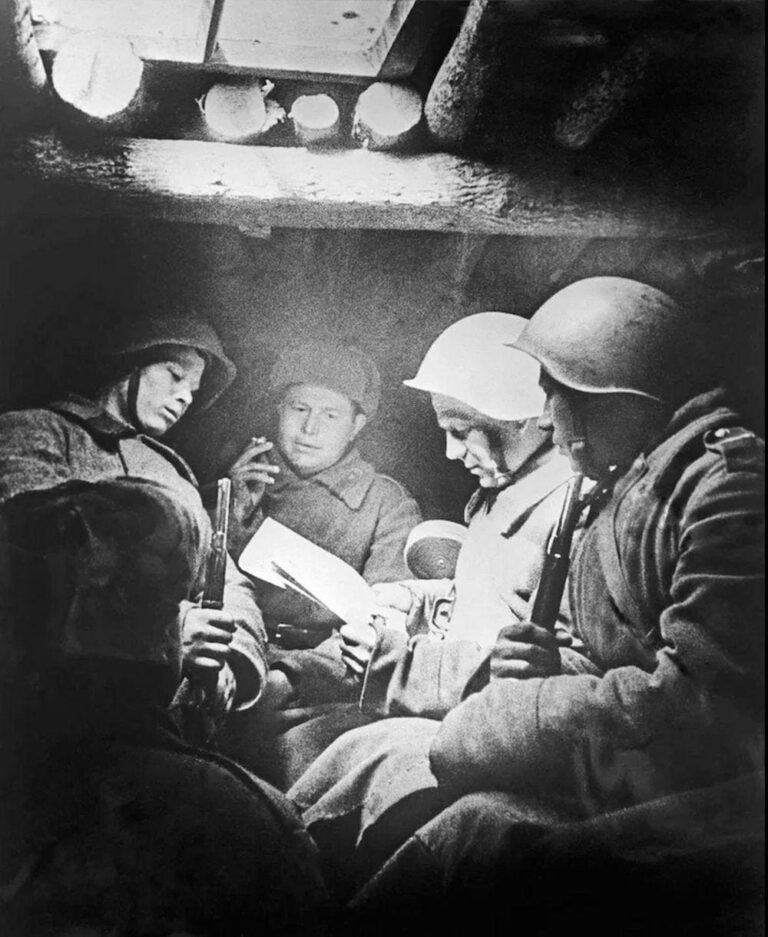
WWII reenacting: Red Army artillery and infantry in defensive position
Result of proper assembly:
- Main ammo pouch should be in front
- Spare pouch should be slightly behind it
- Shoulder strap should run through the middle of the main pouch
If items have separate shoulder straps:
If the spare ammo pouch, grenade pouch, or canteen use their own straps, wear them like this:
- Grenade pouch – over the right shoulder, resting on the left side
- Spare ammo pouch and canteen – over the left shoulder, resting on the right side
Placement:
- Spare ammo pouch under the main pouch, slightly behind it
- Canteen behind the spare pouch
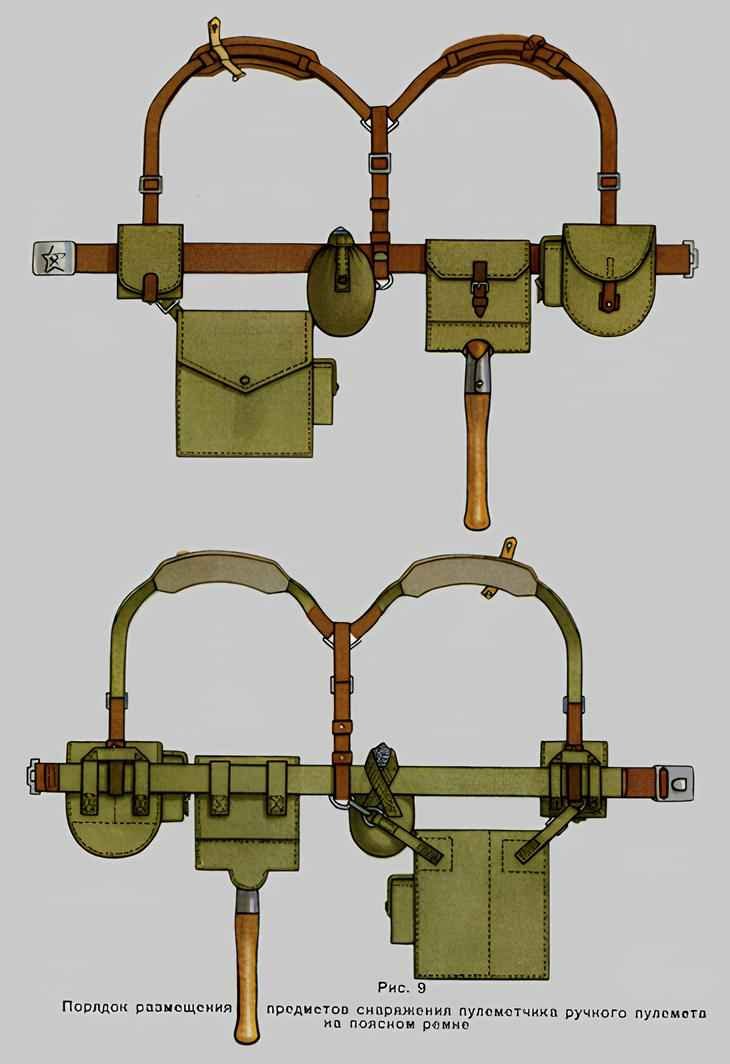
Fig. 9
Layout of equipment items on the waist belt of a light machine gunner.
Adjusting the shoulder strap:
Adjust it to your height so that:
- The connection point of front and rear straps sits in the middle of your back (between shoulder blades)
- Front straps lie flat and tight on your shoulders
Adjust length using buckles so that:
- Straps do not slip off shoulders
- The belt is supported at the waist
Adjusting the waist belt:
- Belt buckle should be centered at the front
- Tighten the belt so gear does not pull it down
(about tight enough so three fingers barely fit under the belt)
When wearing over a greatcoat:
- Tuck the belt and rear strap under the back strap (tab) of the coat
- The belt should sit over the buttons
1. PACKING THE BACKPACK
Backpack description
At the bottom, the backpack has two narrow straps, each with two buckles, used to attach items such as the shelter half (tent) and rain cape.
In the center of the bottom, there is a back hook with a strap used to attach the backpack to the waist belt.
To secure the rolled greatcoat, the backpack has four coat straps. One of them (the long strap) is used to tie the ends of the roll when the greatcoat is carried over the shoulder.
Before packing, prepare all items.
Place the backpack with the back panel on the ground, opening facing you, and pack it as follows:
a) Inside pocket:
- underwear set
- on top of it: spare towel
- spare foot wraps (portyanki)
- handkerchiefs
Place all items neatly, without folds, fitting the size of the pocket.
This creates a soft layer between your back and hard items (cup, mess tin, etc.) inside the backpack.
b) Bottom of the backpack:
- food supply bag
- wrapped salt
c) Right side:
- repair kit bag
- inside it: a mug with separately wrapped sugar and tea
d) Left side:
- mess tin in cover
- bread placed inside the mess tin
The mess tin must always be in a cover or wrapped in paper.
e) Above the mug:
- neatly folded towel
- along the side wall: spoon
After packing:
- tighten the backpack with the cords
- tie the ends into a loop
- fasten the flap strap to the buckle
f) Outer pockets:
- right pocket: toiletry kit (in a bag)
- left pocket: rifle cleaning kit (in a bag)
- fasten the straps
Important:
To prevent damage from gun oil:
- wipe the oil container carefully
- close it tightly
- wrap it in cloth or fiber before placing it in the bag
Preparation and Attachment of a Greatcoat Roll
Unfasten the strap from the left button and lay the greatcoat on the ground with the outer side facing down.
Spread the sleeves to the sides.
Fold down the collar and straighten all folds and pockets.
Fold the top part of the coat over the bottom part along the line of the strap.
Then fold in the corners of the coat evenly on both sides, including the ends of the sleeves.
Fold the bottom edge of the coat up toward the collar.
Roll the coat tightly, starting from the waist area.
While rolling, keep smoothing out any folds, align the ends, and press the roll with your knees to make it tight and flat.
Place the finished roll in a horseshoe shape under the backpack, with the fold facing down.
Adjust the ends so they are even.
Hold the ends from below, place the backpack on its right side, and tighten the left side of the roll with the strap.
Then turn the backpack over and tighten the right side with the second strap.
The roll should be neat and tight against the backpack.
The ends of the roll should be aligned with the bottom edge of the backpack.
For carrying over the shoulder, make a longer roll without folding the sleeve ends.
Fold it in half and tie both ends tightly with a long strap.
Attaching Tent Stakes and Shelter Half
Tent stakes and the shelter half are attached under the bottom of the backpack using two straps.
First, tie together two support poles and two stakes with a cord (rope) and place them into the pouch.
Then fold the shelter half into a roll, and put the individual camouflage net inside the roll.
Loosen the tent straps.
Pass each strap through the loops of the stake pouch, then through the loops on the backpack.
Fasten the straps tightly using one buckle, and secure the ends into the fixed loops.
Use the second buckle to attach the rolled shelter half.
Tuck the ends of the straps into the loops.
The attached stakes and shelter half should not press against your body.
Attaching Protective Socks
Place the rolled protective socks on top of the greatcoat roll.
Fix them in place using the upper straps together with the greatcoat roll.
Attaching the Steel Helmet
Unfasten the chin strap.
Pass one end through the frame on the top of the backpack, between the shoulder straps.
Tie the ends of the chin strap tightly together.
Place the backpack flap strap over them and fasten it with the buckle.
The top part of the helmet should be covered by the greatcoat roll.
Adjusting the Backpack on Assault Gear
Adjust the length of the shoulder straps and side straps.
The top edge of the backpack should be at shoulder level and sit straight, without pulling backward.
The side straps should be attached slightly above the chest line, about one or two fingers above the nipples (around the level of the chest pockets).
When fastened, these straps should be tight and help support the backpack so it does not slide down your back.
The shoulder straps, which are connected to the ammunition pouches, should also be tight and help support the pouches.
Adjust the back strap with the hook so that, when it is attached to the belt, it is slightly tight.
This helps keep the backpack stable when you bend forward or move to the sides.
After doing all this, your backpack and straps will be properly adjusted.
Packing the Field Bag
In the part of the bag that rests against your back, place:
underwear, a towel, foot wraps (portyanki), and handkerchiefs.
At the bottom of the bag, across its width, place your emergency food supply and salt, well wrapped.
In the left corner of the bag, put your cleaned and wrapped weapon cleaning kit.
On top of the biscuits (galety), place:
on the left – the mess tin in its cover, with one day’s bread ration inside;
on the right – the repair kit, and on top of it – a mug, with the handle facing outward.
Inside the mug, place wrapped sugar and tea.
On top of the mug, place your personal hygiene items wrapped in a small towel.
After packing, tighten the top of the bag with a cord.
Twist the top slightly and secure it tightly using the shoulder strap loop.
If Carrying Shelter Half in the Bag
If you carry the shelter half (poncho tent) inside the bag:
fold it flat and place it against the back side of the bag first.
Then place all other items on top, as described above.
The tent accessories, tied together with cord, should be placed at the bottom of the bag, on the outer side.
Carrying the Bag
The packed bag is worn on your back using shoulder straps.
The straps should be tightened evenly and connected across the chest.
Both shoulder straps should be the same length.
Carrying the Greatcoat Roll and Shelter Half
The greatcoat roll and shelter half are carried over the left shoulder, with the fold facing down.
Putting On, Taking Off and Wearing Field Gear
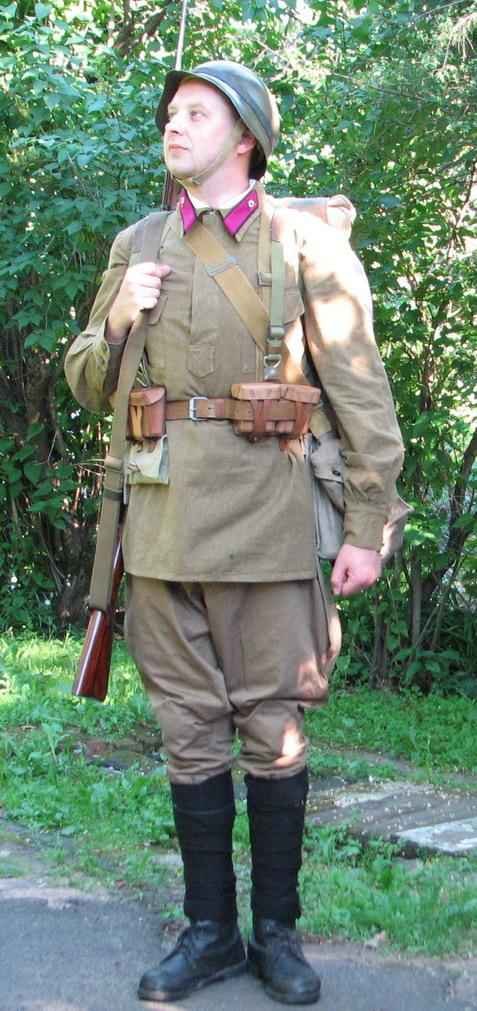
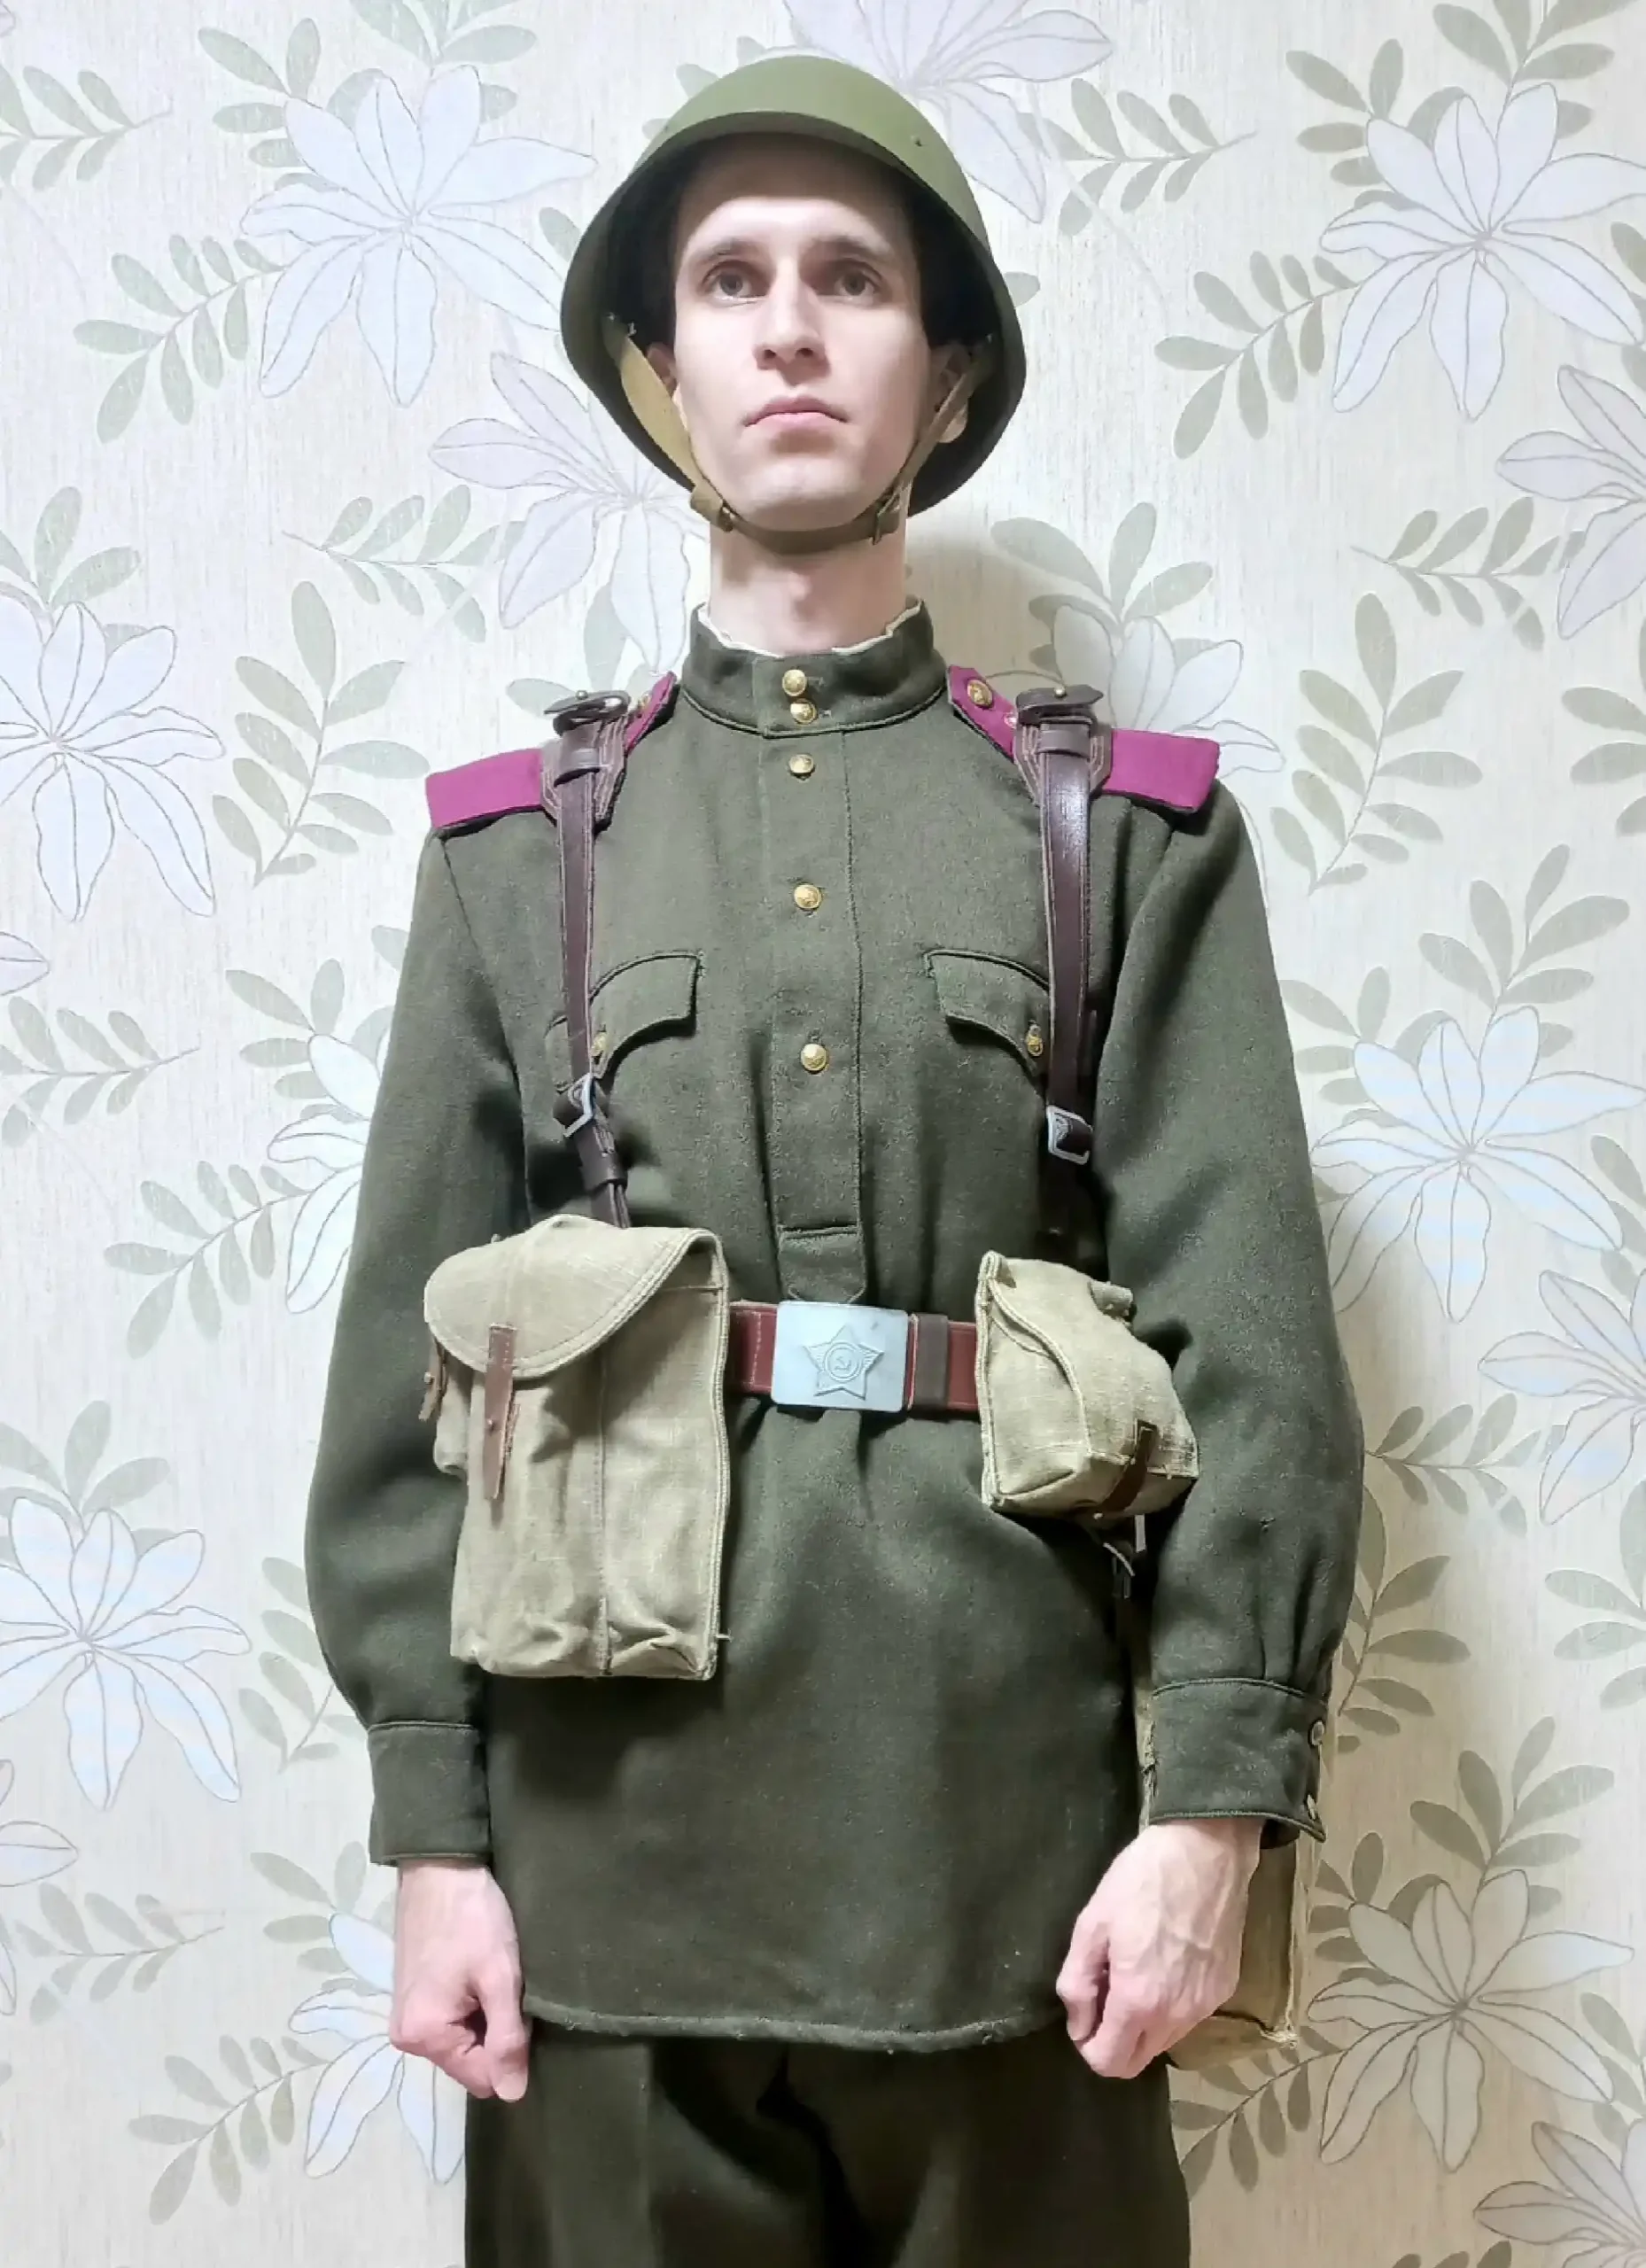
Basic RKKA Soldier Equipment
First, fix your uniform properly.
Smooth out all folds in your underwear and tunic, especially on the shoulders.
Fasten all buttons and hooks.
Straighten the back fold of the greatcoat and fix the collar.
If you don’t do this, the gear can rub your shoulders, back, and hips.
Put the first aid packet in the left chest pocket of your tunic.
Put the ID capsule (medallion) in the inner front pocket of your trousers on the left side.
Putting On the Gear
Put on your equipment so that:
a) The belt is tight around your waist, and the buckle is exactly in the center.
The free end should be tucked into the belt loop and under the ammo pouch.
b) The front parts of the shoulder straps are tight, and the back part is centered on your back.
c) The ammo pouches are in front, on both sides of the belt buckle, about two fingers away from it.
The extra ammo pouch is on the right side, under the main one.
d) The grenade pouch is on the left side, behind the left ammo pouch and bayonet cover.
e) The canteen is on the right side, behind the shovel (or axe).
f) The shovel (or axe) is on the right hip.
After putting on the gear, smooth out all folds of the tunic or greatcoat again.
If needed, tighten the front shoulder straps.
Gas Mask Bag
Put on the gas mask bag (with protective cape inside) over your right shoulder, on top of the gear straps.
The bag should hang on your left side, behind the grenade pouch.
The top of the bag should be level with the belt, with the flap facing outward.
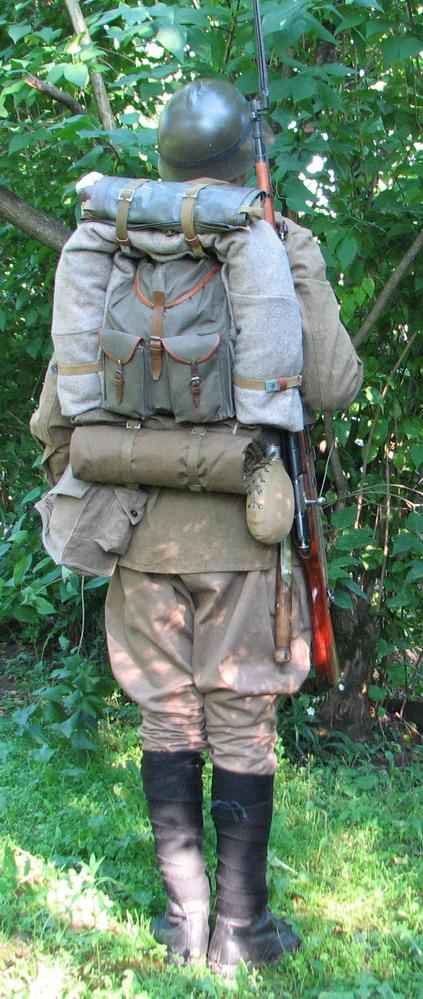
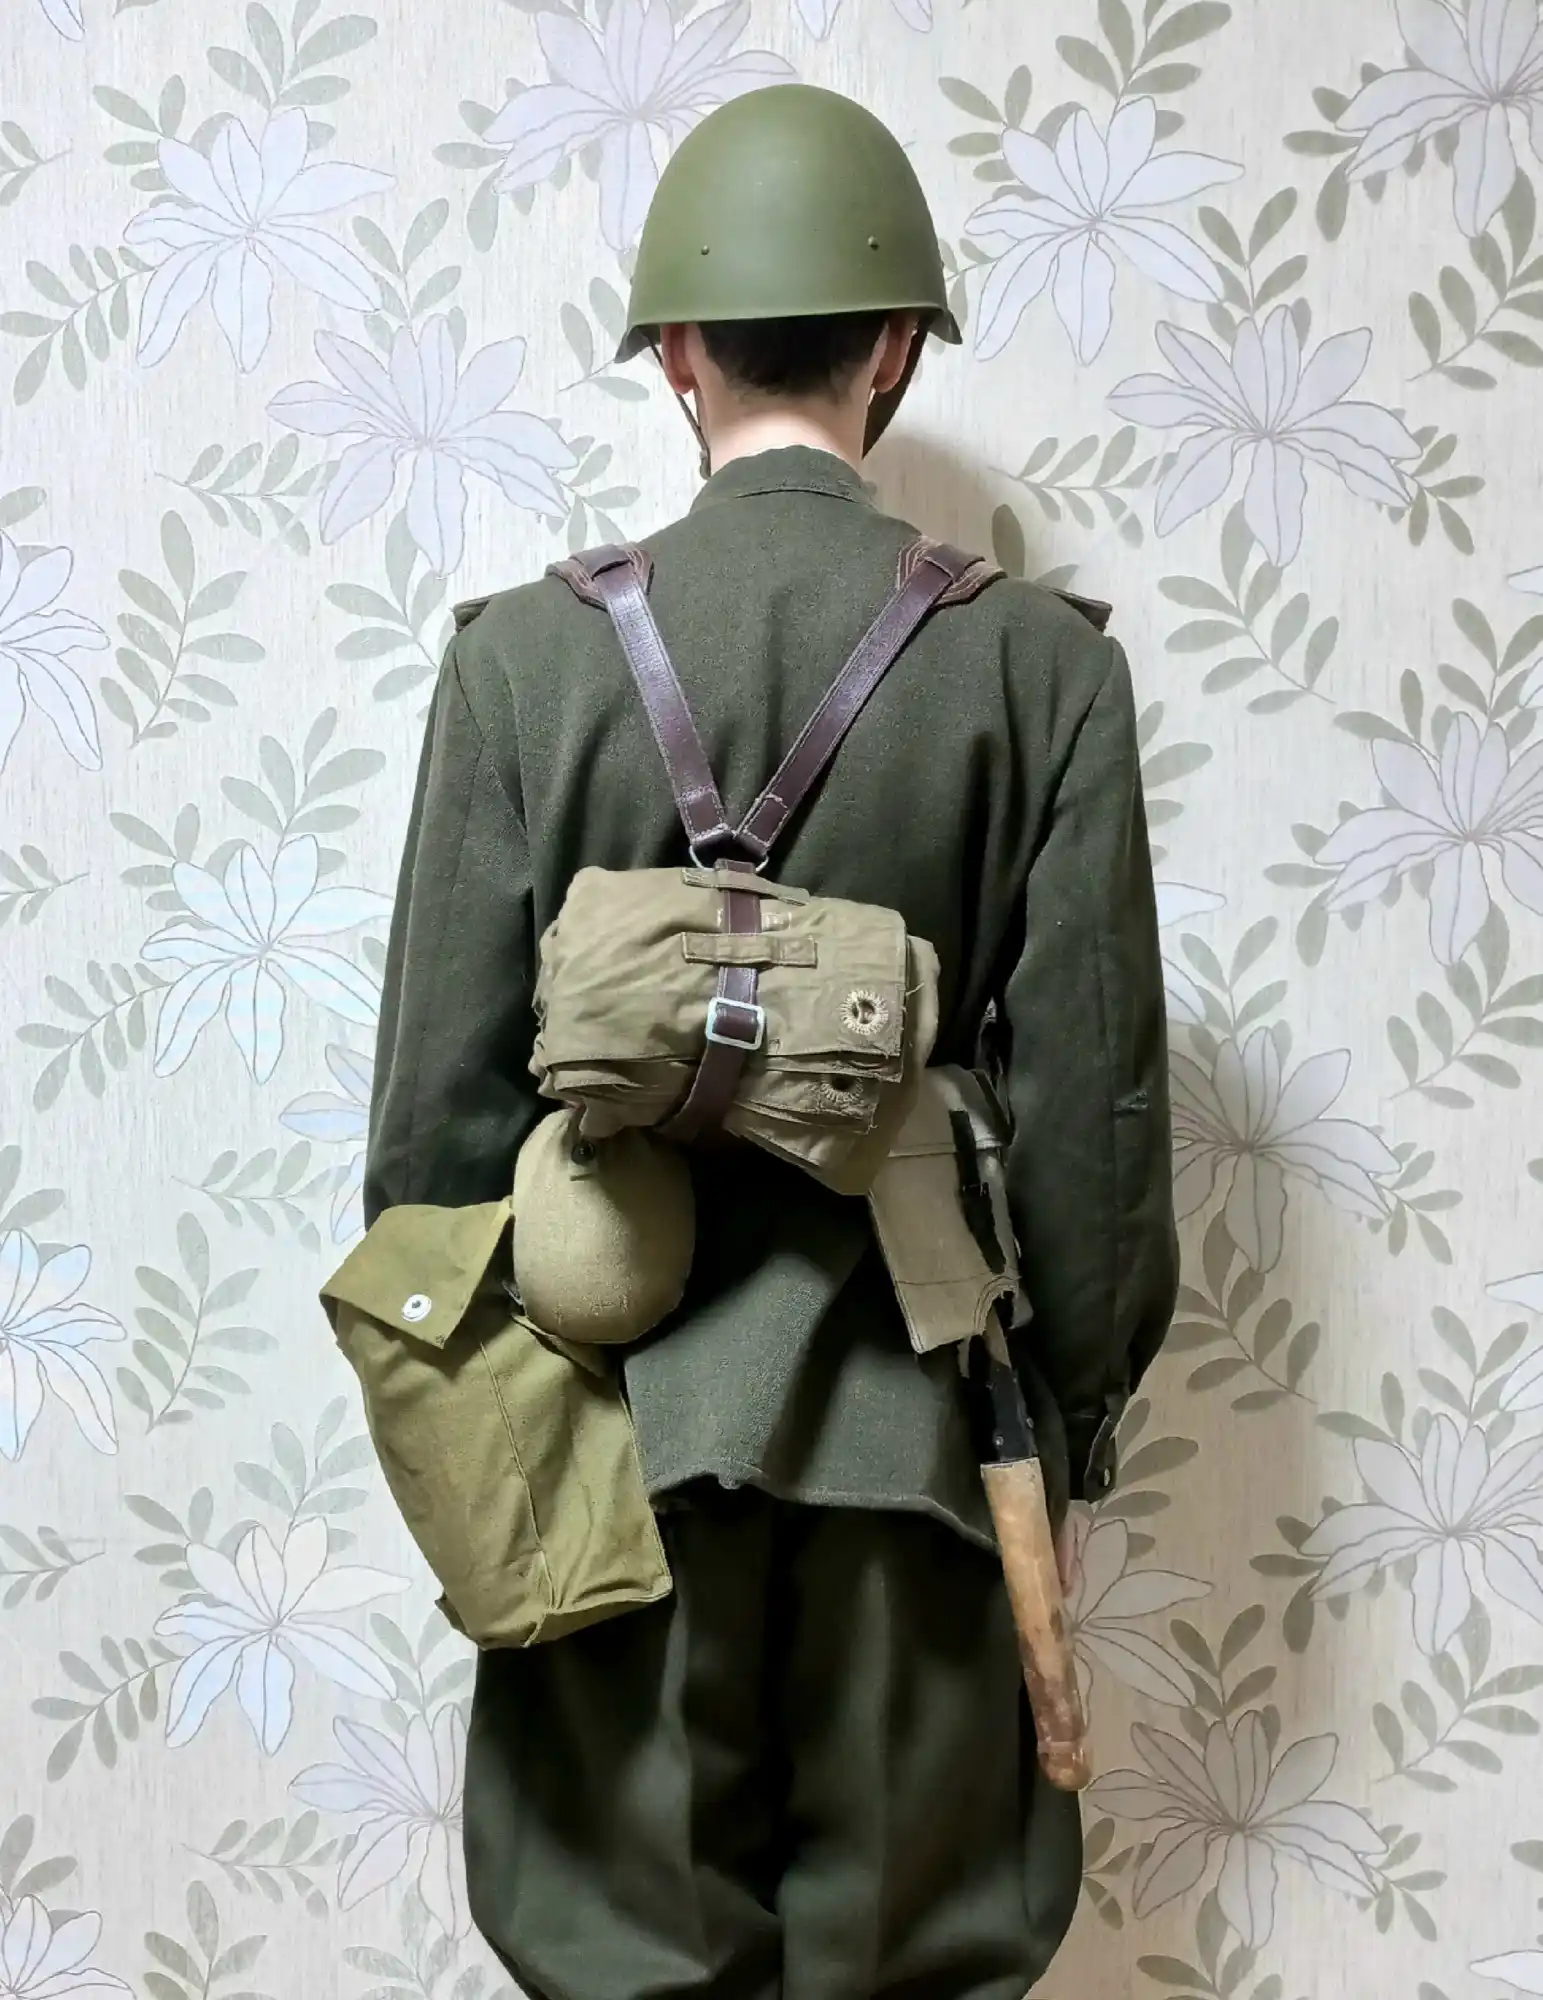
Putting On the Backpack
To put the backpack on your back:
a) Grab the shoulder straps with crossed hands and throw the backpack onto your back in one movement, putting your left arm through the strap.
b) With your right hand, attach the right side strap to the hook at the bottom of the backpack, while holding it with your left hand.
c) Fix your sleeves and clothing folds again.
d) Attach the back hook of the backpack to your belt.
e) Attach the front end of the right shoulder strap to the ring on the right ammo pouch.
f) Attach the front end of the left shoulder strap to the ring on the left ammo pouch, passing it under the gas mask strap.
Final Check
After putting on the backpack, check all straps.
A properly adjusted backpack should sit straight on your back,
with its top edge at shoulder level.
More interesting articles:
WWII Reenacting for Beginners: How to Look Like a Real Soldier
Equipment Set of a Red Army Soldier in 1941 and 1945
How to Put Together a WWII Soviet Soldier and Officer Uniform for Reenactment
What Soviet Soldiers Really Ate During WW2
Looking original Soviet boots and accessories? Please visit here: Soviet Boots Store